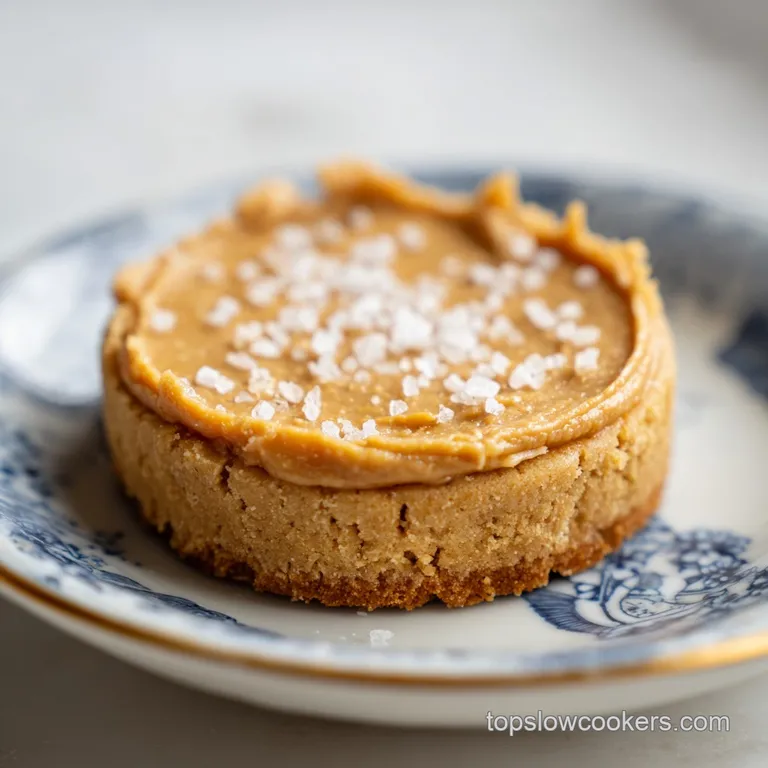
3-Ingredient Peanut Butter Cookie with Sea Salt
- Time: Active 5 minutes, Passive 10 minutes, Total 15 minutes
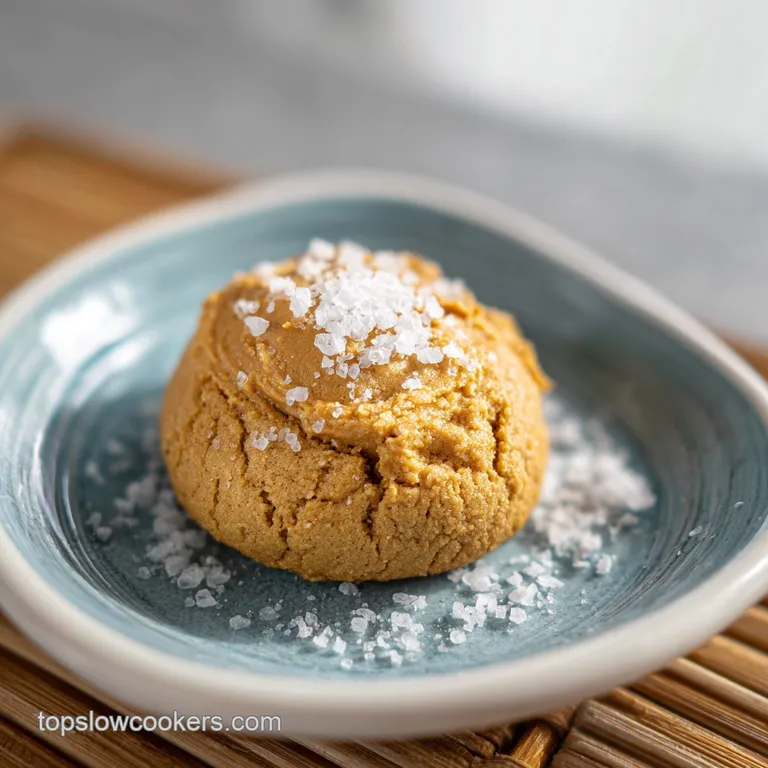
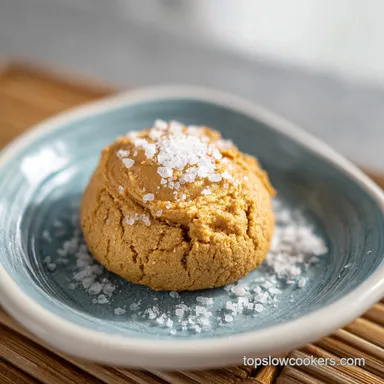
- Flavor/Texture Hook: A rich, nutty base with a signature sea salt shatter
- Perfect for: Last minute guests, beginner bakers, or late night cravings
- Perfect 3 Ingredient Peanut Butter Cookie with Sea Salt
- Why Most Simple Cookie Recipes Fail
- Planning Your Quick Weeknight Cookie Bake
- Minimalist Ingredients for Creamy Cookie Magic
- Basic Tools for Zero Fuss Prep
- Step-By-Step Flow for Salty Cookies
- Troubleshooting Your Peanut Butter Dough
- Easy Flavor Variations for This Base
- Store and Refresh Your Salty Treats
- Best Ways to Enjoy These Cookies
- Recipe FAQs
- 📝 Recipe Card
Perfect 3 Ingredient Peanut Butter Cookie with Sea Salt
Imagine walking into your kitchen after a long day, craving something sweet but having zero energy for a flour dusted disaster on your counters. You open the pantry and there it is: a jar of creamy peanut butter.
You don't need a stand mixer, you don't need to chill the dough for hours, and you certainly don't need a degree in pastry arts. The aroma that hits you as these bake is pure, concentrated nostalgia, smelling like roasted nuts and caramelized sugar.
Discover our signature 3 Ingredient Peanut Butter Cookie with Sea Salt for a truly delightful treat. This recipe is a staple in my house because it relies on the natural oils of the peanut butter to create a texture that is surprisingly sophisticated.
When you pull these out of the oven, the edges are just firm enough to hold, while the centers remain soft and fudge like. It's the kind of cookie that makes you realize that sometimes, fewer ingredients actually lead to a better result.
We've all been through those recipes that claim to be "simple" but then require five different bowls and a specific type of expensive chocolate. This isn't that. This is about the harmony between the salt and the fat, the way the coconut sugar provides a deep, almost molasses like undertone, and how the egg ties it all together into a matte, beautiful dough.
Let's get into why this works and how you can get these on your cooling rack in just 15 minutes.
Why Most Simple Cookie Recipes Fail
The biggest mistake people make with minimalist baking is treating the ingredients like an afterthought. Because there are only three main components, the quality and the way you combine them matters more than in a standard cookie.
Most recipes fail because the dough ends up too oily or too crumbly, usually because the emulsion between the fat and the egg wasn't properly established.
- Protein Denaturation
- When you stir the egg into the peanut butter vigorously, you are creating a structural web that holds the fat in place, preventing the cookies from melting into a puddle.
- Hygroscopic Nature
- Coconut sugar pulls moisture from the air and the egg, ensuring the interior of the cookie stays velvety rather than turning into a dry biscuit.
- Maillard Reaction
- Even without flour, the proteins in the peanuts and the egg react with the sugars at 350°F (180°C) to create that mahogany colored crust.
- Lipid Suspension
- The natural oils in the peanut butter are suspended within the sugar egg matrix, which is why we don't need additional butter or oil.
| Method | Time | Texture | Best For |
|---|---|---|---|
| This 3 Ingredient Version | 15 minutes | Velvety and dense | Quick weeknight cravings |
| Classic Flour Based | 45 minutes | Light and cakey | Traditional bake sales |
| Chilled Dough Method | 2 hours | Crispy and chewy | Professional presentation |
There is a distinct difference between a cookie that is "fast" and one that is "good." Many quick recipes sacrifice texture for speed, but by using coconut sugar and natural peanut butter, we're actually hitting a flavor profile that flour based cookies struggle to reach. If you are looking for other protein rich treats, you might also enjoy my protein chocolate chip cookies which use oats for extra fiber.
Planning Your Quick Weeknight Cookie Bake
Success with this recipe is all about the flow. Since the total time is only 15 minutes, you need to have your oven preheating before you even touch the peanut butter jar. I've found that if I wait to turn on the oven until the dough is mixed, the dough sits too long and the oil starts to separate.
You want to work quickly while the dough is "tacky" and easy to roll.
| Servings | Ingredient Adjustments | Pan Size | Cook Time |
|---|---|---|---|
| 12 Cookies | 1 cup PB, 1/2 cup sugar, 1 egg | Standard Baking Sheet | 10 minutes |
| 24 Cookies | 2 cups PB, 1 cup sugar, 2 eggs | Two Baking Sheets | 12 minutes |
| 6 Cookies | 1/2 cup PB, 1/4 cup sugar, 1/2 egg | Small Toaster Tray | 10 minutes |
When you're scaling this up for a party, remember that these cookies don't spread as much as traditional ones. You can fit quite a few on a single tray, but you still want that 2 inch gap to allow the hot air to circulate around the edges. This circulation is what gives you that firm, mahogany colored rim while keeping the inside soft. If you're a fan of buttery bakes, these are a great contrast to more complex buttery vanilla cakes that take much longer to prep.
Minimalist Ingredients for Creamy Cookie Magic
Let's talk about the components. We are using natural creamy peanut butter because it has a higher oil content and a more intense roasted flavor than the stabilized "no stir" versions.
The coconut sugar is a secret weapon here; it has a lower melting point than white sugar, which contributes to that fudgy texture we're after.
| Ingredient | Science Role | Pro Secret |
|---|---|---|
| Natural Peanut Butter | Primary Fat & Protein | Use the bottom of the jar for more grit and structure |
| Coconut Sugar | Sweetener & Texture | Sift it first to avoid hard molasses clumps in the dough |
| Large Egg | Structural Binder | Room temperature eggs emulsify 30% faster with nut fats |
- - 1/2 cup (100g) Coconut Sugar
- For sweetness and color. Why this? It adds a subtle caramel note that complements the salt perfectly.
- - 1 large egg
- Our only binder. Why this? The lecithin in the yolk helps bind the oil and sugar into a cohesive dough.
- - 1 tsp flaky sea salt
- The finishing touch. Why this? It provides a sensory "shatter" and cuts through the richness of the fats.
Chef's Tip: Freeze your peanut butter for 10 minutes before mixing. This slightly firms up the natural oils, making the dough much easier to handle if your kitchen is warm.
Basic Tools for Zero Fuss Prep
You don't need much, but having the right basics makes this a five minute job rather than a ten minute chore. I prefer a heavy duty silicone spatula over a wooden spoon because the dough is quite stiff and tacky; you need something that can scrape the sides of the bowl effectively.
A standard baking sheet lined with parchment paper is non negotiable. Because these cookies are flourless, they are delicate when they first come out of the oven. If you try to bake them directly on the metal, they might stick or tear when you try to move them.
The parchment allows them to slide off easily once they've had a chance to firm up.
Finally,, a heavy duty fork is essential for that classic cross hatch pattern. This isn't just for aesthetics. Since the dough is dense, the fork marks flatten the cookie evenly, ensuring the heat penetrates the center at the same rate it cooks the edges.
Without flattening them, you'd end up with a raw, oily center and burnt bottoms.
step-by-step Flow for Salty Cookies
- Preheat your oven to 350°F (180°C) and line your tray with parchment. Note: A hot oven is crucial for the immediate "set" of the cookie edges.
- In a large mixing bowl, combine the natural peanut butter, coconut sugar, and egg.
- Stir vigorously with a spatula until the oil is fully incorporated. Wait until the dough transforms into a matte, stiff ball that pulls away from the bowl.
- Scoop tablespoon sized portions and roll them into smooth spheres between your palms. Note: If the dough sticks to your hands, dampen them slightly with water.
- Place the spheres 2 inches apart on the baking sheet.
- Use a heavy duty fork to press a cross hatch pattern into each ball. Flatten them to approximately 1/2 inch thickness for even baking.
- Generously sprinkle the flaky sea salt over the tops while the dough is still tacky.
- Bake at 350°F (180°C) for 10 minutes until the edges are firm and mahogany colored.
- Allow cookies to cool completely on the baking sheet. Wait until they are cool to the touch before moving them, as they firm up into a velvety texture during this time.
Pro Tip: If you want a perfectly round cookie, use a round biscuit cutter or a wide mouth glass to "scoot" the cookie into a circle immediately after it comes out of the oven while it's still soft.
Troubleshooting Your Peanut Butter Dough
Even with only three ingredients, things can go sideways if the ratios or temperatures are off. The most common issue is the dough feeling too "wet." This usually happens if your peanut butter was particularly oily (common with fresh ground varieties).
Why does my dough turn into a crumbly mess?
If the dough is crumbling before you can even roll it, your egg might have been too small, or the peanut butter was from the bottom of a jar where it was dry. You need that moisture to hydrate the sugar. Add a teaspoon of water or a tiny bit more peanut butter to bring it back together.
| Problem | Root Cause | Solution |
|---|---|---|
| Cookies are oily/flat | PB was too warm or oily | Chill the dough for 15 mins before rolling |
| Cookies are gritty | Sugar didn't dissolve | Mix the egg and sugar first before adding PB |
| Cookies are falling apart | Moved them too soon | Let them cool for at least 15 mins on the tray |
Common Mistakes Checklist: - ✓ Not stirring the natural peanut butter properly before measuring (oil must be fully mixed in). - ✓ Using a "low-fat" peanut butter (these lack the structural fats needed for a flourless bake).
- ✓ Over baking past the 10 minute mark (they will turn from velvety to rock hard very quickly). - ✓ Skipping the sea salt (the cookies will taste flat and overly sweet without it). - ✓ Forgetting to flatten with a fork (the centers will stay raw and mushy).
Easy Flavor Variations for This Base
Once you've mastered the basic 3 Ingredient Peanut Butter Cookie with Sea Salt, you can start playing with the "4th ingredient" to change the vibe. My favorite shortcut is adding a teaspoon of espresso powder to the dough; it deepens the flavor of the peanuts and makes the coconut sugar taste like dark chocolate.
If you want a crunchier texture, use extra crunchy peanut butter. The chopped nuts provide a great structural contrast to the velvety dough. You could also swap the sea salt for a drizzle of melted dark chocolate once the cookies have cooled.
Just make sure you don't add too many liquid mix ins, or you'll break the delicate emulsion that holds these together.
| Original Ingredient | Substitute | Why It Works |
|---|---|---|
| Coconut Sugar | Brown Sugar | Provides a similar moisture content and deep flavor |
| Peanut Butter | Almond Butter | Works well but creates a slightly grainier texture |
| Sea Salt | Smoked Salt | Adds a savory, campfire like depth to the nuttiness |
When scaling this recipe down for just one or two people, it's easier to beat the egg in a small cup first and then use exactly half (about 2 tablespoons). This ensures you keep the ratio perfect.
If you scale up, don't just double the salt on top taste as you go, as the saline hit can become overwhelming quickly.
Store and Refresh Your Salty Treats
Because these cookies have a high fat content and no flour, they stay moist much longer than traditional cookies. I actually think they taste better on day two when the flavors have had time to meld and the coconut sugar has fully softened into the nut butter.
- - Myth
- You need flour for a "real" cookie texture. Truth: Fat and protein (from the egg and nuts) create a dense, fudgy crumb that is often more satisfying than a cakey, flour filled version.
- - Myth
- Flourless cookies are always healthy. Truth: While gluten-free, these are still rich in fats and sugars. They are a treat, not a salad!
- - Myth
- You can't over mix flourless dough. Truth: While there is no gluten to develop, over mixing can cause the oil to separate from the peanut butter, leaving you with a greasy mess.
- - Fridge
- Keep in an airtight container for up to 7 days. They get a bit firmer when cold, which some people actually prefer.
- - Freezer
- These freeze beautifully. Store baked cookies for up to 3 months. To reheat, just pop them in a 300°F (150°C) oven for 3-4 minutes until the "velvety" center returns.
- - Zero Waste Tip
- If you have leftover crumbs or a cookie breaks, don't toss it. Crumble it over vanilla ice cream or mix it into a morning bowl of oatmeal for a salty sweet protein boost.
Best Ways to Enjoy These Cookies
These are incredibly rich, so they pair best with something that has a bit of acidity or coldness. A cold glass of milk is the classic choice, but a sharp oat milk latte or a bitter black coffee really makes the sea salt pop.
I love serving these as a "quick fix" dessert after a heavy meal because they feel indulgent without being physically heavy.
If you're feeling fancy, you can make mini ice cream sandwiches. Take two cooled cookies, put a small scoop of sea salt caramel ice cream in the middle, and press them together. Wrap them in plastic wrap and freeze for an hour. The cookie stays soft even when frozen, making it the perfect vessel for a frozen treat.
Trust me on this: don't skip the cooling time. I know the "sizzle" of the tray and the aroma are tempting, but the structure of these cookies relies on the fats solidifying as they drop in temperature. If you grab one too early, it will literally crumble in your hands.
Patience for just ten minutes will reward you with that perfect, signature shatter and a soft, decadent center. Right then, let's crack on and get that oven preheated!

Recipe FAQs
What are the three ingredient peanut butter cookies?
This recipe consists of natural creamy peanut butter, coconut sugar, and one large egg. These simple components combine to create a dense, gluten-free cookie with a rich, nutty flavor profile.
What does sea salt do for cookies?
It provides a sharp contrast to the sweetness of the sugar. By sprinkling flaky sea salt on the tacky dough before baking, you balance the deep, earthy richness of the peanut butter with a bright, savory finish.
What is Snoop Dogg's cookie recipe?
This specific three ingredient recipe is not associated with Snoop Dogg. While many celebrity chefs share cookie variations, this particular method relies on the specific structural transformation of natural peanut butter and coconut sugar binding together into a stiff, matte dough.
Can you put sea salt on peanut butter cookies?
Yes, it is highly recommended. Adding the salt before baking allows the crystals to adhere to the surface as the cookie spreads, ensuring a consistent flavor in every bite.
How to ensure the dough reaches the right consistency?
Stir the peanut butter, sugar, and egg vigorously until the mixture pulls away from the sides of the bowl. You are looking for the dough to transform into a matte, stiff ball; if you enjoyed mastering this texture control, the same principle of fat-to-binder ratio is essential for our creamy cheesecake success.
Is it true the cookies should be moved immediately after baking?
No, this is a common misconception. You must allow the cookies to cool completely on the baking sheet to firm up, as they are fragile when they first come out of the 350°F oven.
How to get the perfect mahogany edges?
Bake the cookies for exactly 10 minutes at 350°F. At this stage, the edges will reach a firm, mahogany colored state while the center remains slightly soft and velvety.
3 Ingredient Peanut Butter Cookies
Ingredients:
Instructions:
Nutrition Facts:
| Calories | 160 kcal |
|---|---|
| Protein | 5.7 g |
| Fat | 10.8 g |
| Carbs | 12.1 g |
| Fiber | 1.3 g |
| Sugar | 9.8 g |
| Sodium | 211 mg |
