Peanut Butter Cookie Recipe: Soft and Chewy
- Time: Active 10 minutes, Passive 10 minutes, Total 20 minutes
- Flavor/Texture Hook: Silky peanut butter finish with a shatter crisp sugar coating
- Perfect for: Busy weeknights, school bake sales, or zero fuss dessert cravings
- Easy Soft and Chewy Peanut Butter Cookie Recipe
- Why These Cookies Stay So Soft
- Choosing the Best Cookie Ingredients
- Essential Items for Your Pantry Stash
- The Tools You Really Need
- Simple Steps for Perfect Results
- Avoid These Common Baking Mistakes
- How to Feed a Crowd Fast
- Busting Common Peanut Butter Myths
- Easy Cookie Variations and Subs
- Proper Storage and Freezing Tips
- Best Ways to Enjoy Cookies
- Recipe FAQs
- 📝 Recipe Card
Easy Soft and Chewy Peanut Butter Cookie Recipe
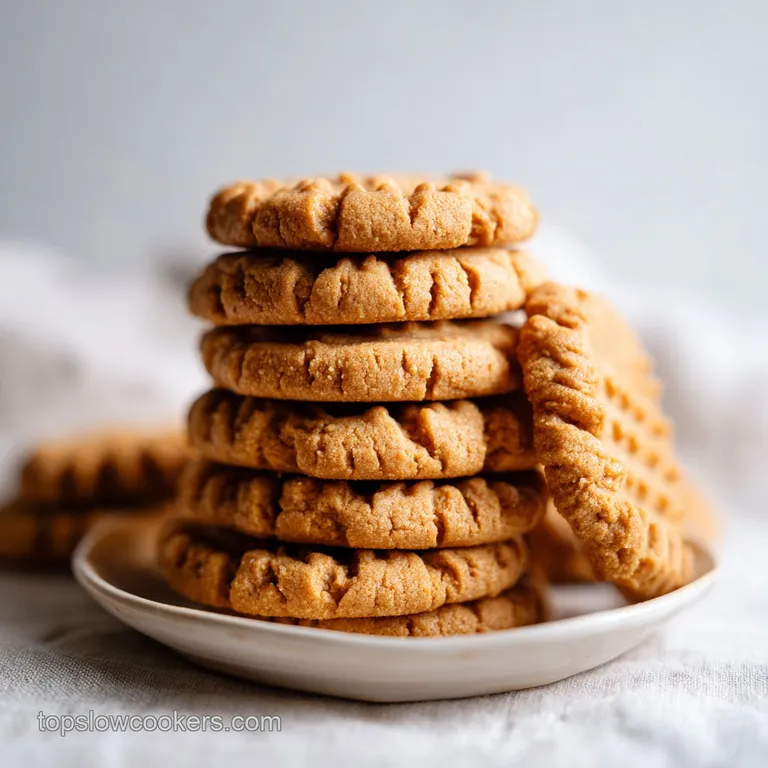
There is a specific sound that happens when you press a cold metal fork into a ball of fresh cookie dough. It is a soft, rhythmic "squish" that leaves behind that iconic cross hatch pattern we all grew up with.
I remember standing in my kitchen on a rainy Tuesday, the house smelling like toasted nuts and warm vanilla, realized that I didn't need a fancy bakery run to feel better. I just needed twenty minutes and a jar of peanut butter.
This peanut butter cookie recipe is my absolute go to because it is reliable. We've all had those cookies that look great in the oven but turn into hockey pucks the second they hit the cooling rack. Not these.
We are aiming for a texture that is dense enough to feel substantial but velvety enough to melt when it hits your tongue. It is the kind of recipe you keep on a stained index card because you know it works every single time.
You don't need to be a professional pastry chef to get these right. In fact, some of the best batches I've ever made were whipped up while I was simultaneously trying to fold laundry and keep the cat off the counter. The beauty of this bake lies in its simplicity.
It’s about the simple joy of a warm cookie and a cold glass of milk, without any of the stress or complicated equipment that usually comes with homemade treats.
Why These Cookies Stay So Soft
Understanding the mechanics behind your bake helps you troubleshoot before the tray even hits the heat. This particular recipe relies on a few specific interactions between fats and sugars to keep the crumb tender.
- Fat Emulsification: By creaming the softened butter with the peanut butter, we create a stable base of tiny air pockets. These pockets expand in the heat, giving the cookie lift so it doesn't become a dense, oily slab.
- Sugar Hygroscopy: Using a high ratio of brown sugar is a secret for moisture. Brown sugar contains molasses, which naturally attracts and holds onto water molecules, preventing the cookies from drying out as they cool.
- Leavening Balance: The combination of baking soda and baking powder works double time. The soda reacts with the acidic brown sugar for immediate lift, while the powder provides a second "poof" during the final minutes of baking.
- Starch Gelatinization: Keeping the egg at room temperature ensures it integrates perfectly with the fats. This creates a strong protein structure that supports the flour, preventing the cookie from falling apart when you pick it up.
| Cook Method | Time | Texture | Best For |
|---|---|---|---|
| Standard Oven | 10 minutes | Crisp edges, soft center | Large batches for crowds |
| Convection Oven | 8 minutes | Even browning, very crispy | Those who love a crunch |
| Air Fryer | 7 minutes | Extra puffy and thick | Small 2 person cravings |
While the standard oven is the most reliable for getting that classic look, the air fryer is surprisingly effective if you only want to bake two or three cookies at a time. Just make sure you line the basket with parchment so the dough doesn't sink through the holes.
Choosing the Best Cookie Ingredients
When you are working with a simple list, the quality of each component really shines through. You don't need the most expensive brands, but you do need to understand how each piece of the puzzle fits together.
| Component | Science Role | Pro Secret |
|---|---|---|
| Creamy Peanut Butter | Provides fat and structural protein | Avoid "natural" oils on-top versions for better stability |
| Light Brown Sugar | Adds moisture and a deep caramel note | Pack it tight into the cup to get the exact moisture level |
| All Purpose Flour | Creates the gluten skeleton of the cookie | Spoon and level the flour into your cup to avoid over packing |
Using a standard commercial peanut butter (like Jif or Skippy) is actually better here than the fancy "natural" versions that separate. The stabilizers in commercial peanut butter keep the dough from becoming too greasy or crumbly.
Essential Items for Your Pantry Stash
- 1 cup (250g) creamy peanut butter: This is the heart of the flavor. Why this? Provides the necessary fats for a melt in-your mouth feel.
- Sub: Almond butter (Note: It will be slightly grainier).
- 0.5 cup (115g) unsalted butter, softened: This gives the cookie its rich, buttery backbone. Why this? Allows for better aeration during the creaming stage.
- Sub: Salted butter (Note: Just skip the extra kosher salt).
- 0.75 cup (150g) granulated white sugar: This helps the edges get that slight crunch. Why this? Essential for the structure and sweet profile.
- Sub: Coconut sugar (Note: Will result in a darker, toastier cookie).
- 0.75 cup (150g) light brown sugar, packed: The secret to the chewy center. Why this? Molasses content keeps the dough hydrated.
- Sub: Dark brown sugar (Note: Adds a stronger molasses flavor).
- 1 large egg, room temperature: Binds everything together. Why this? Room temp eggs emulsify much faster with fats.
- Sub: Flax egg (Note: The cookie will be denser and less puffy).
- 1 tsp vanilla extract: Rounds out the nuttiness. Why this? Enhances the perception of sweetness.
- Sub: Almond extract (Note: Use only 1/4 tsp as it is very strong).
- 1.5 cups (190g) all purpose flour: The main structure. Why this? Provides enough gluten for chew without being tough.
- Sub: 1 to-1 gluten-free flour blend.
- 0.75 tsp baking soda: For browning and lift.
- 0.5 tsp baking powder: For a lighter, airy texture.
- 0.25 tsp kosher salt: To balance the sugar.
- 0.25 cup (50g) granulated sugar for rolling: The finishing touch.
Chef's Tip: If your brown sugar has turned into a rock, toss it in a bowl with a damp paper towel and microwave it for 20 seconds. It will soften right back up!
The Tools You Really Need
You don't need a kitchen full of gadgets to make a world class peanut butter cookie. In fact, a simple hand mixer and a sturdy bowl will get the job done just as well as a thousand dollar stand mixer.
- Large Mixing Bowl: You need enough space to cream the butter and sugar without it flying over the sides.
- Hand Mixer: This is the best tool for "creaming" because you can feel the resistance of the dough.
- Baking Sheets: Heavy duty pans are better because they distribute heat evenly, preventing burnt bottoms.
- Parchment Paper: This is a non negotiable for me. It ensures zero sticking and makes cleanup a breeze.
- The Humble Fork: For that signature look. A heavy metal fork works better than a plastic one.
If you don't have parchment paper, you can use a silicone mat. But honestly, for this specific peanut butter cookie recipe, parchment yields a slightly crispier bottom that I really love. It absorbs just a tiny bit of the excess oil from the peanut butter.
Simple Steps for Perfect Results
- Preheat your oven to 350°F (175°C). Line two large baking sheets with parchment paper or silicone baking mats.
- In a large bowl, cream together the 0.5 cup softened butter, 1 cup creamy peanut butter, 0.75 cup white sugar, and 0.75 cup brown sugar on medium high speed for 2–3 minutes until the mixture looks pale and fluffy. Note: This aeration is what keeps them from being heavy.
- Add the 1 large egg and 1 tsp vanilla extract to the creamed mixture, beating until the batter is silky and completely smooth.
- In a separate small bowl, whisk together the 1.5 cups flour, 0.75 tsp baking soda, 0.5 tsp baking powder, and 0.25 tsp kosher salt.
- Gradually add the dry ingredient mixture to the wet ingredients on low speed, mixing only until the white streaks of flour are gone. Note: Over mixing here makes for tough cookies.
- Roll the dough into 1 inch balls. Roll each ball in the 0.25 cup of granulated sugar until they are fully coated in white crystals.
- Place balls 2 inches apart on the prepared baking sheets. Use your fork to flatten them slightly with a criss cross pattern.
- Bake for 10 minutes until the edges are just barely golden. Note: They will look underdone in the middle, but they will firm up as they cool.
Chef's Tip: Freeze your dough balls for 10 minutes before putting them in the oven if your kitchen is hot. This stops them from spreading too thin.
Avoid These Common Baking Mistakes
Even with a foolproof recipe, small environmental factors can throw things off. The most common issue people face is the "oily spread," where the peanut butter separates and turns the cookie into a pancake.
Preventing Oily Spread
If your cookies are melting into one big sheet, your butter was likely too warm. It should be "room temperature," which actually means it should still feel slightly cool to the touch and hold an indent when pressed, rather than being shiny or greasy.
If you’ve already mixed the dough and it feels oily, pop it in the fridge for 30 minutes before rolling.
Eliminating Dryness
Crumbly cookies usually come from two things: too much flour or over baking. When measuring flour, never scoop the measuring cup directly into the bag. This packs the flour down and gives you way more than you need. Instead, spoon it into the cup and level it off with a knife.
Also, remember that a cookie finished in the oven is a dry cookie. Pull them out when they still look soft!
| Problem | Root Cause | Solution |
|---|---|---|
| Flat Cookies | Butter was too soft or melted | Chill dough for 30 minutes before baking |
| Crumbly Texture | Too much flour or "natural" PB used | Use spoon and level method for flour |
| Burnt Bottoms | Dark baking sheet or low rack | Use parchment paper and bake on center rack |
If you are struggling with a texture that feels too dense, you might want to try these soft peanut butter cookies which use a slightly different ratio for a loftier bite.
Common Mistakes Checklist
- ✓ Check that your baking soda is fresh (drop a pinch in vinegar to see if it fizzes).
- ✓ Ensure the oven is fully preheated for at least 15 minutes before the first tray goes in.
- ✓ Don't skip the sugar roll; it creates a moisture barrier that keeps the inside soft.
- ✓ Use a cookie scoop for perfectly even balls so they all finish cooking at the same time.
How to Feed a Crowd Fast
This recipe is incredibly easy to scale up if you are hosting a party or a school event. Because the ingredients are mostly shelf stable, you can buy in bulk without much worry.
When doubling the recipe (to make 48 servings), you can simply x2 every ingredient. However, when it comes to the spices and leavening agents, I usually go a little lighter. For a double batch, use 1.25 tsp of baking soda rather than a full 1.5 tsp to avoid a metallic aftertaste.
You will also need to work in batches, keeping the dough in the fridge while the first set of trays is in the oven.
If you are scaling down for a small snack (making 6-12 cookies), it can be tricky with the egg. The best way is to crack the egg into a small bowl, whisk it well, and then use exactly half by weight or volume. This ensures the fat to protein ratio stays perfect even for a tiny batch.
| Servings | Peanut Butter | Flour | Cook Time |
|---|---|---|---|
| 12 Cookies | 0.5 cup | 0.75 cup | 10 minutes |
| 24 Cookies | 1 cup | 1.5 cups | 10 minutes |
| 48 Cookies | 2 cups | 3 cups | 12 minutes (if 2 trays) |
Busting Common Peanut Butter Myths
Many people think that you need to use a specific "baking" peanut butter, but that isn't true. The biggest myth is that natural, oil separation peanut butter is better for you in cookies. In reality, the lack of stabilizers in natural peanut butter often leads to a gritty texture and a cookie that leaks oil.
Stick to the creamy, commercial stuff for that velvety finish.
Another common misconception is that the "criss cross" pattern is just for decoration. While it looks iconic, it actually serves a functional purpose. Peanut butter dough is very dense.
By pressing it down with a fork, you increase the surface area and flatten the ball, ensuring the heat can reach the center of the cookie at the same rate the edges are browning. Without the press, you'd end up with a raw center and burnt edges.
Easy Cookie Variations and Subs
I love a classic, but sometimes you want to mix things up. If you are a fan of texture, you can absolutely swap the creamy peanut butter for extra crunchy. It won't change the chemistry of the bake, but it will give you little nuggets of toasted peanuts in every bite.
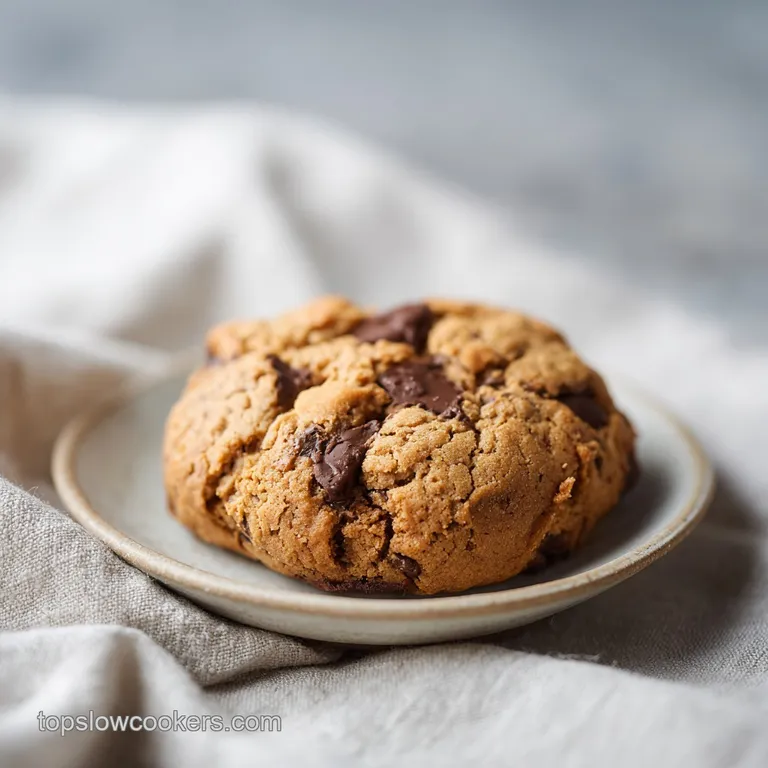
Crafting Chewy Peanut Butter Cookies with Chocolate Chips
If you want to take these to the next level, fold in 1 cup of semi sweet chocolate chips at the very end. The saltiness of the peanut butter makes the chocolate taste even richer. If you prefer a simpler twist, you can try this Peanut Butter Cookie with Sea Salt which focuses on a more minimalist approach.
Adapting for a Hershey Kiss Finish
To make "Blossoms," do not press the dough with a fork. Bake the round balls for about 8 minutes, pull them out, and immediately press a chocolate kiss into the center. The heat from the cookie will melt the bottom of the chocolate just enough to "glue" it in place.
Return them to the oven for the final 2 minutes.
Proper Storage and Freezing Tips
The best part about these cookies is that they actually taste better the next day once the flavors have had time to settle.
- Countertop Storage: Keep them in an airtight container for up to 5 days. I like to throw a single slice of white bread into the container; the cookies will actually pull the moisture out of the bread to stay soft.
- Freezing the Dough: This is my favorite "pro move." Roll the balls, coat them in sugar, and freeze them on a tray for an hour. Once they are hard, toss them into a freezer bag. You can bake them straight from frozen just add 2 minutes to the bake time.
- Freezing Baked Cookies: They freeze beautifully for up to 3 months. Wrap them in foil and then place in a freezer bag to prevent freezer burn.
Zero Waste Tips
If you have a few cookies that got a little too crunchy, don't throw them away. Pulse them in a food blender to create cookie crumbs. These are incredible as a crust for a cheesecake or sprinkled over a bowl of vanilla bean ice cream.
You can also use leftover peanut butter from the bottom of the jar to make a quick glaze by whisking it with a little powdered sugar and milk.
Best Ways to Enjoy Cookies
Eating a peanut butter cookie while it is still warm enough to be slightly floppy is a top tier life experience. But if you want to be a bit more intentional, there are a few ways to really make the moment special.
Pairing with Cold Dairy
A tall glass of ice cold whole milk is the classic choice, but don't overlook a hot cup of black coffee. The bitterness of the coffee cuts through the fatty richness of the peanut butter, making the whole experience feel much more balanced.
If you’re feeling adventurous, a cold glass of oat milk adds a nice toasted grain flavor that complements the nuts perfectly.
Creating the Ultimate Ice Cream Sandwich
Take two of your cooled cookies and put a massive scoop of chocolate or banana ice cream in the middle. Press them together until the ice cream reaches the edges. Since these cookies stay soft even when chilled, they won't turn into bricks in the freezer, making them the perfect vessel for a homemade sandwich.
No matter how you serve them, this peanut butter cookie recipe is designed to be a stress free win in your kitchen. It’s about taking twenty minutes out of a busy day to make something that smells like home and tastes like a childhood memory. So, grab that jar of peanut butter and let's get baking!

Recipe FAQs
What are the three ingredients in peanut butter cookies?
This is a common misconception. While some simplified variations exist, this specific recipe requires a complete blend of peanut butter, softened butter, white sugar, brown sugar, one egg, vanilla, flour, baking soda, baking powder, and salt to achieve the correct structure and flavor.
Is it true Snoop Dogg has a secret peanut butter cookie recipe?
No, this is a common misconception. I focus exclusively on this classic, reliable version that uses the specific ingredient ratios provided above to ensure consistent results every time.
What are common peanut butter cookie mistakes?
Overcrowding the oven and using expired leaveners are the most frequent errors. Always ensure your baking soda is fresh by testing it in vinegar, and strictly follow the 10-minute bake time at 350°F to prevent dry, crumbly centers.
Which cookies are good for diabetics?
Standard recipes like this one are not suitable for a diabetic diet because they contain significant amounts of granulated and brown sugar. If you need low-sugar alternatives, seek out recipes specifically formulated with sugar substitutes.
How to get the perfect criss cross pattern?
Press a fork lightly into the top of the dough ball once it is placed on the baking sheet. Doing this twice once horizontally and once vertically creates the signature pattern while flattening the ball just enough for even heat distribution.
How to keep the centers soft?
Pull the cookies out exactly at the 10-minute mark even if they look slightly underbaked in the middle. If you enjoyed mastering precise bake times here, you will find the same technique essential for keeping other delicate doughs from becoming too crisp.
How to store peanut butter cookies?
Place them in an airtight container at room temperature to maintain their texture for up to five days. Keeping them sealed prevents moisture loss, which is the primary cause of cookies becoming hard or stale.
Classic Peanut Butter Cookies
Ingredients:
Instructions:
Nutrition Facts:
| Calories | 183 kcal |
|---|---|
| Protein | 3.7 g |
| Fat | 9.4 g |
| Carbs | 22.6 g |
| Fiber | 0.9 g |
| Sugar | 14.5 g |
| Sodium | 110 mg |
