Moist Homemade Vanilla Cake: Silky and Velvety
- Time: Active 20 minutes, Passive 30 minutes, Total 50 minutes
- Flavor/Texture Hook: Silky, buttery, and incredibly velvety
- Perfect for: Birthday celebrations or a comforting weeknight treat
- Creating This Moist Homemade Vanilla Cake Recipe
- Why This Method Guarantees Success
- Essential Baking Times and Metrics
- Components for a Velvety Crumb
- Essential Tools for Better Baking
- Steps for a Flawless Result
- Fixes for Common Baking Errors
- Options for Every Dietary Need
- Keeping Every Slice Fresh Longer
- Simple Ways to Serve This
- Myths About Vanilla Cake
- Recipe FAQs
- 📝 Recipe Card
Creating This Moist Homemade Vanilla Cake Recipe
There is something about the aroma of vanilla bean paste hitting warm buttermilk that instantly takes me back to my grandmother’s kitchen on a Tuesday afternoon. In our house, vanilla cake wasn't a "plain" choice; it was the gold standard of comfort.
While many cultures view vanilla as a basic backdrop, its history as a precious spice from the orchids of Mexico and Madagascar makes it a true queen of the pantry. Every time I preheat the oven to 180°C, I'm reminded that this isn't just about dessert it's about a tradition of sharing something simple yet deeply satisfying.
We’ve all been there: you follow a recipe, but the result is a dry, crumbly mess that needs a gallon of milk just to swallow. I used to think that was just how scratch cakes were until I learned about the nuances of fat ratios and temperature.
This isn't your average birthday sponge; it’s a carefully balanced formula designed for maximum moisture and a silky mouthfeel. We're talking about a crumb so tender it almost shatters when you press a fork into it, yet it's sturdy enough to hold up under layers of silky buttercream.
Right then, let's get into what makes this specific bake a staple in my kitchen. You don't need a culinary degree to pull this off, but you do need to follow the logic of the ingredients. We're going to ditch the old-fashioned "cream the butter and sugar" method for something much more reliable.
Trust me on this: once you see how this batter comes together into a glossy, thick ribbon, you’ll never go back to the box. It’s all about the prep and the patience.
Why This Method Guarantees Success
The secret here is all about how we handle the flour. Most people overwork their batter, leading to a tough, bread like texture that's anything but comforting. By changing the order of operations, we protect the delicate structure of the sponge.
- Fat First Coating: Adding butter directly to the flour prevents long gluten strands from forming, ensuring a tender, melt in-your mouth texture.
- Acid Interaction: Buttermilk and sour cream provide acidity that reacts with the baking soda for a soft, high rising lift.
- Oil Supplementation: While butter provides that classic flavor, the neutral oil stays liquid at room temperature, keeping the cake moist even after a day on the counter.
- Sugar Saturation: Using 400g of sugar does more than sweeten; it holds onto water molecules, preventing the cake from drying out during the 30 minutes of baking.
| Method | Prep Time | Resulting Texture | Best For |
|---|---|---|---|
| Reverse Creaming | 20 minutes | Velvety, tight crumb | Layer cakes, carving |
| Standard Creaming | 25 minutes | Airy, fluffy, open | Cupcakes, light snacks |
| All In-One | 10 minutes | Denser, slightly coarse | Quick loaf cakes |
Choosing the right approach depends on what you need. For this moist homemade vanilla cake recipe, the reverse creaming method is the winner because it produces a flat topped, professional looking layer every single time without the doming or cracking often seen in standard methods.
It's the zero fuss way to get a bakery quality result at home.
Essential Baking Times and Metrics
Precision is your best friend when you're working with 345g of sifted cake flour. If you treat baking like a science experiment where you get to eat the results, you'll find it much more rewarding. I always keep my kitchen scale handy because measuring by volume is the fastest way to a dry cake.
| Component | Role | Pro Secret |
|---|---|---|
| Cake Flour (345g) | Structural base | Sift twice to ensure maximum aeration and no lumps. |
| Granulated Sugar (400g) | Tenderizer | Sugar interferes with gluten, making the crumb softer. |
| Butter (170g) | Flavor & Fat | Must be 65°F (18°C) to incorporate perfectly into the flour. |
| Vanilla Paste (1 tbsp) | Primary Flavor | Bean paste adds those gorgeous black specks and deeper aroma. |
Getting the temperatures right is non negotiable for a weeknight bake that actually works. If your buttermilk is cold, it will seize the butter, and you'll end up with a chunky batter that doesn't rise evenly. I usually set my ingredients out on the counter at least two hours before I plan to start.
If I'm in a rush, I'll put the eggs in a bowl of warm water for five minutes it's a lifesaver.
Components for a Velvety Crumb
Each ingredient in this list has a specific job to do. We aren't just tossing things in a bowl; we're building a structural masterpiece. The use of both eggs and egg whites, for instance, provides the perfect balance of richness from the yolks and lightness from the whites.
- 345g cake flour, sifted: Essential for that low protein, delicate snap.
- 400g granulated sugar: Provides sweetness and locks in moisture.
- 1.5 tsp baking powder & 0.5 tsp baking soda: Our dual leavening power team.
- 1 tsp fine sea salt: To cut through the sweetness and highlight the vanilla.
- 170g unsalted butter, softened: Use high-quality butter for the best flavor.
- 60ml neutral oil: Grapeseed is my go to for its clean finish.
- 3 large eggs + 2 egg whites: Room temperature is a must for emulsification.
- 240ml full fat buttermilk: Provides the tang and the tenderizing acid.
- 60g sour cream: Adds fat and thickness to the batter.
- 1 tbsp pure vanilla bean paste: Don't skimp here it's the star of the show.
| Original Ingredient | Substitute | Why It Works |
|---|---|---|
| Cake Flour (345g) | All Purpose + Cornstarch | Remove 4 tbsp AP flour, add 4 tbsp cornstarch; mimics low protein. |
| Buttermilk (240ml) | Whole Milk + Lemon Juice | 1 cup milk + 1 tbsp lemon; adds necessary acidity for leavening. |
| Sour Cream (60g) | Full fat Greek Yogurt | Similar fat and acid profile; maintains moisture levels perfectly. |
If you find yourself out of buttermilk, don't panic. The milk and lemon juice trick is a classic for a reason it works. However, for that truly creamy, comforting texture we're after, the real deal buttermilk is always superior. It’s thicker and has a specific type of fat globule that helps the Italian Lemon Pound Cake and this vanilla version stay tender for days.
Essential Tools for Better Baking
You don't need a professional kitchen, but a few key items make this moist homemade vanilla cake recipe much easier to manage. I always use a stand mixer fitted with a paddle attachment.
The paddle is designed to rub the butter into the flour without whipping in too much air, which is exactly what we need for that sandy texture in step three.
Chef's Tip: If you don't have parchment paper, you're living on the edge. Even the best "non stick" pans can hold onto your cake for dear life. Always line the bottoms to ensure a clean release every single time.
Another trick I've learned the hard way: buy a cheap oven thermometer. Most home ovens are off by 10 to 20 degrees. If your oven is too hot, the edges will brown before the center is set. If it's too cold, the cake will take too long to bake and end up dry.
Knowing your actual temperature at 180°C (350°F) is the difference between a "good" cake and a "how did you make this?" cake.
Steps for a Flawless Result
Follow these steps exactly, and you'll be rewarded with a sponge that is velvety and rich. The timing is crucial here don't rush the mixing once the liquids are in.
Phase 1: Precision Prep
- Preheat your oven to 180°C (350°F). Grease two 20cm (8 inch) round cake pans and line the bottoms with parchment paper. Ensure all refrigerated ingredients the 3 eggs, 2 whites, 240ml buttermilk, and 170g butter are strictly at room temperature. Note: Cold ingredients will break the emulsion, leading to a greasy bake.
Phase 2: Reverse Creaming
- In a stand mixer bowl, combine the 345g sifted cake flour, 400g granulated sugar, 1.5 tsp baking powder, 0.5 tsp baking soda, and 1 tsp fine sea salt. Mix on low for 30 seconds to distribute the leaveners.
- With the mixer still on low, add the 170g softened butter and 60ml neutral oil one tablespoon at a time. Continue mixing until the mixture resembles fine, sandy crumbs. Note: This step is vital as it coats the flour in fat to inhibit gluten.
Phase 3: Building Structure
- In a separate jug, whisk together the eggs, egg whites, buttermilk, sour cream, and 1 tbsp vanilla bean paste until fully combined and smooth.
- Gradually pour the liquid mixture into the dry ingredients while mixing on low speed. Once the flour is hydrated, increase to medium speed for exactly 60 seconds to aerate. Look for a pale, silky, and thick batter.
Phase 4: The Golden Bake
- Divide the batter evenly between your two prepared pans. You can use a scale for perfect accuracy if you’re feeling precise.
- Bake for 28–32 minutes. You'll know it's done when a toothpick comes out clean and the edges just start to pull away from the pan.
- Cool in the pans for 10 minutes. This allows the structure to set so the cake doesn't fall apart when you flip it.
- Invert onto a wire rack to cool completely. Never frost a warm cake you'll end up with a melted, soupy mess!
Fixes for Common Baking Errors
Even the most seasoned home cooks have bad days. Maybe you forgot the baking soda or your oven had a temper tantrum. Most of the time, the problem is something simple that we can fix for the next batch.
Fixing a Sunken Center
If your cake looks like a crater, it usually means one of two things: either you opened the oven door too early, causing a sudden temperature drop, or your leavening agents are expired. Baking powder loses its punch after about six months.
To test it, drop a half teaspoon into some hot water; if it doesn't bubble vigorously, throw it out and start fresh.
Prevent a Coarse Crumb
A coarse, holey texture is often the result of over mixing once the liquids are added. While we want to aerate the batter for 60 seconds, going longer than that starts to develop the gluten. Think of it like making bread too much kneading makes it chewy. We want the opposite for our vanilla cake.
| Problem | Root Cause | Solution |
|---|---|---|
| Greasy Texture | Butter was too soft/melted | Ensure butter is exactly 65°F (18°C), not oily to the touch. |
| Dry, Crumbly Slice | Over baked or too much flour | Use a scale for 345g flour; check doneness 5 mins early. |
| Domed, Cracked Top | Oven temperature too high | Use a thermometer to confirm 180°C (350°F); reduce by 10° if needed. |
Common Mistakes Checklist:
- ✓ Check that your eggs are actually room temperature (about 20°C).
- ✓ Don't skip the sifting of the 345g cake flour; it prevents dense pockets.
- ✓ Ensure your baking pans aren't dark colored, which can cause over browning.
- ✓ Never over fill the pans; leave at least an inch of space at the top.
- ✓ Let the cakes cool completely before wrapping them in plastic.
Options for Every Dietary Need
Sometimes you need to adjust for guests or pantry limitations. This recipe is quite robust, but you have to be careful with moisture levels when swapping ingredients. If you're looking for something much more decadent and dense, you might even consider trying a Slow Cooker Chocolate Lava Cake alongside this one for a dessert spread.
dairy-free Alternatives
To make this dairy-free, you can swap the 170g butter for a high-quality vegan butter stick (the kind that's solid at room temperature). For the buttermilk, use 240ml of unsweetened soy milk mixed with 1 tablespoon of apple cider vinegar. Let it sit for 10 minutes until it curdles.
Soy milk has the highest protein content among plant milks, which helps maintain the cake's structure.
gluten-free Version
This is a bit trickier because we rely so much on the low protein nature of cake flour. If you must go gluten-free, use a high-quality "1 to-1" flour blend that contains xanthan gum.
Note: gluten-free flours absorb more moisture, so you might need to add an extra tablespoon of buttermilk to keep it from becoming gritty.
Keeping Every Slice Fresh Longer
If you aren't eating the cake immediately, storage is key. Because of the 60ml of oil and 400g of sugar, this cake actually holds moisture very well. I've found that it often tastes even better the second day as the vanilla flavor has more time to permeate the crumb.
- Room Temperature: Store unfrosted layers wrapped tightly in plastic wrap for up to 3 days. Once frosted, a cake carrier or an airtight container is best.
- Freezing: You can freeze these sponges! Wrap them in two layers of plastic wrap and then a layer of foil. They’ll stay perfect for up to 3 months. Thaw in the fridge overnight before frosting.
- Zero Waste Tip: If you end up with scraps from leveling the tops, don't throw them away. Toss them in a bowl with a little leftover frosting to make cake pops, or layer them with berries and whipped cream for a quick trifle.
Simple Ways to Serve This
This moist homemade vanilla cake recipe is a blank canvas. While a classic vanilla buttercream is the obvious choice, I love experimenting with textures. A silky chocolate ganache or a tart raspberry coulis can completely change the vibe of the dish.
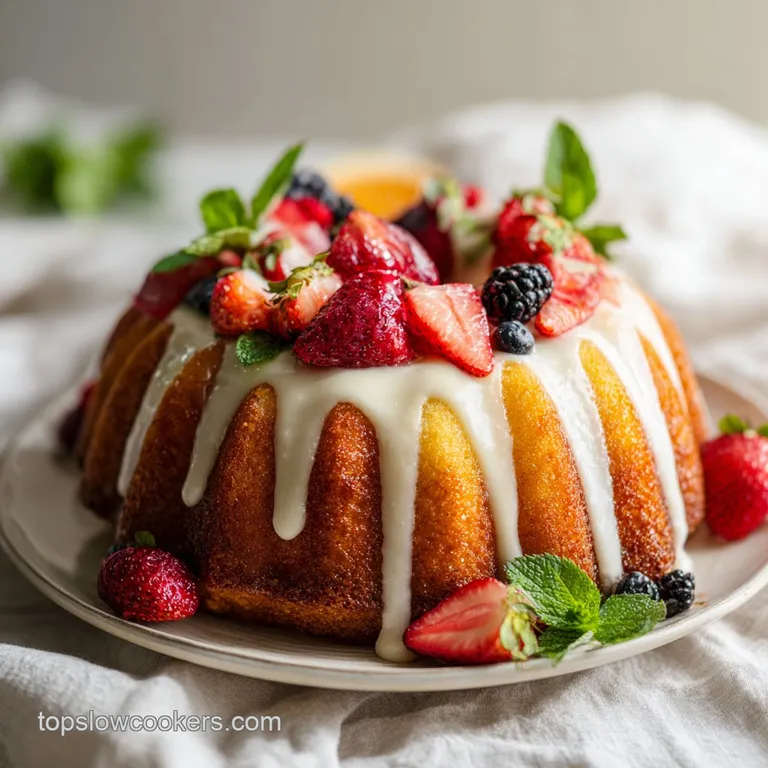
For a summer afternoon, try serving a slice with a dollop of whipped cream and macerated strawberries. The acidity of the berries cuts through the richness of the butter and sour cream beautifully.
If you're feeling adventurous, a sprinkle of lemon zest in the batter adds a bright note that makes the vanilla pop even more.
Whatever you do, don't overcomplicate it. The beauty of this recipe is that it's designed to stand on its own. It’s creamy, comforting, and has that perfect "scratch made" feel that you just can't get from a box. Right then, get your scale out and let’s start baking!
There’s a kitchen full of amazing aromas waiting for you.
Myths About Vanilla Cake
One big misconception is that "the more you beat the eggs, the fluffier the cake." In this reverse creaming method, that's actually not true. We want to incorporate the eggs slowly to create a stable emulsion, not a foam.
Over beating at the end will just give you huge air bubbles that collapse in the oven, leaving you with a sad, flat sponge.
Another myth is that "vanilla extract and vanilla bean paste are the same." While you can swap them, the paste contains the seeds and a much more concentrated flavor profile. If you're making this for a special occasion, the extra cost of the 1 tablespoon of paste is worth every penny for the visual and flavor boost it provides.
Finally, some people think you can't use all purpose flour for a "real" vanilla cake. You absolutely can, but you have to be careful with the protein content. If you use AP flour, the cake will be slightly more "bready" and less "velvety." The cake flour is what gives us that specific, professional crumb we're all chasing.
Stay consistent with the 345g measurement, and you'll be golden.

Recipe FAQs
What's the secret to a moist vanilla cake?
The secret is using a combination of softened butter and neutral oil. While butter provides essential flavor, the oil remains liquid at room temperature, ensuring the crumb stays tender and moist for days.
What is the secret to super moist cake?
Incorporating sour cream and full fat buttermilk creates a superior, velvety texture. These acidic ingredients tenderize the gluten in the cake flour, preventing the crumb from becoming tough or dry.
How to make homemade cake extra moist?
Mix the softened butter and oil into the dry ingredients until the mixture resembles fine, sandy crumbs. This specific technique, known as reverse creaming, coats the flour proteins in fat to inhibit gluten development, resulting in a significantly softer sponge.
What is a secret ingredient to moisten cakes?
Using vanilla bean paste adds intense moisture and aromatic depth. If you enjoyed mastering this flavor infusion technique, you can apply similar flavor balancing principles to our Buffalo Chicken Dip.
Is it true I can use cold ingredients straight from the fridge?
No, this is a common misconception. You must ensure all refrigerated items like eggs, buttermilk, and butter are strictly at room temperature to avoid breaking the batter emulsion, which causes a dense or oily cake.
How to ensure the cake doesn't dry out in the oven?
Bake only for 28 32 minutes and check for doneness using a toothpick. Removing the pans as soon as the toothpick comes out clean or with a few moist crumbs prevents the edges from over baking and losing moisture.
How to cool the cakes properly?
Cool the cakes in the pans for exactly 10 minutes before inverting them onto a wire rack. This brief rest allows the structure to set slightly, ensuring the cakes remain intact without drying out from excessive airflow.
Moist Homemade Vanilla Cake

Ingredients:
Instructions:
Nutrition Facts:
| Calories | 423 kcal |
|---|---|
| Protein | 5.4 g |
| Fat | 19.3 g |
| Carbs | 57.2 g |
| Fiber | 0.8 g |
| Sugar | 33.5 g |
| Sodium | 318 mg |
