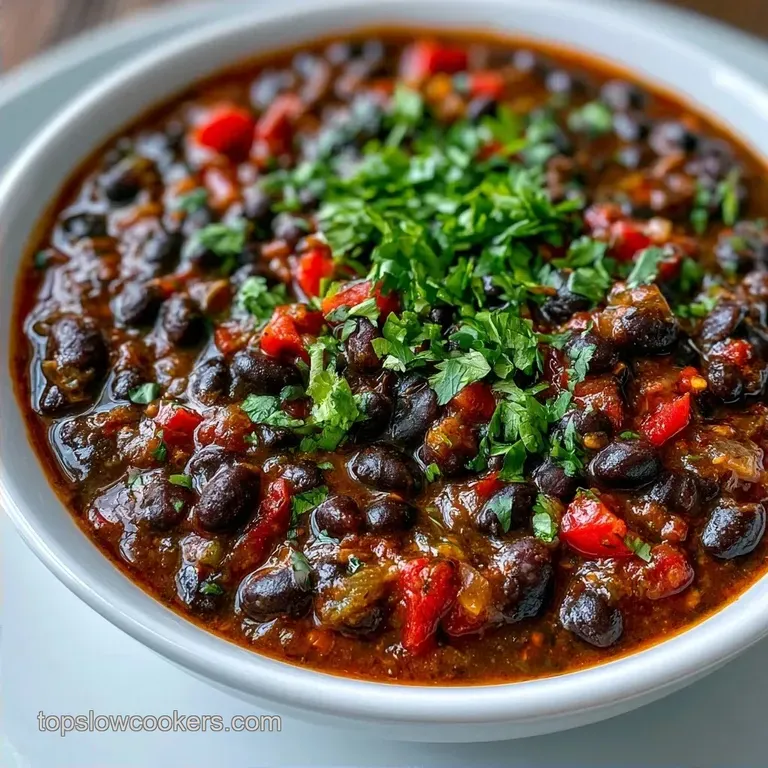
Black Bean Chili Recipe: Hearty and Zesty
- Time:10 minutes active + 40 minutes simmering = Total 50 minutes
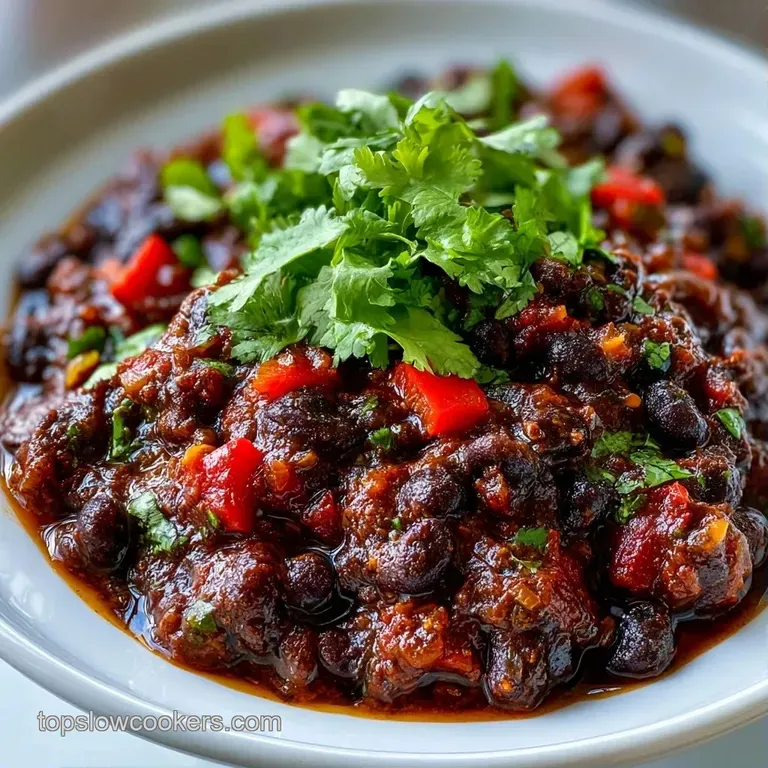
- Flavor/Texture Hook: Zesty, smoky, and thick with a velvety bean finish
- Perfect for: budget-friendly weeknight dinners, meal prep, or a vegan crowd
That first sizzle of onions and red peppers hitting hot olive oil is where the magic starts. I remember the first time I tried to make a "healthy" chili, I just threw everything in a pot and boiled it. It tasted like bean soup, honestly.
It was thin, bland, and completely lacked that deep, soulful warmth you expect from a real bowl of comfort. I thought I just needed more salt, but the real answer was in how I handled the heat and the timing.
Forget the idea that vegetarian chili is just a "substitute" for the real thing. When you treat the vegetables and spices with a bit of respect, you get something that stands on its own.
This version focuses on building layers of flavor, starting with a toasted spice base and finishing with a hit of fresh lime to wake everything up. It's a budget friendly win that feels like a treat.
In this Black Bean Chili Recipe, we're focusing on a few key moves that turn pantry staples into a restaurant quality meal. You'll get a rich, concentrated flavor that usually takes hours to develop, but we're doing it in under an hour. Let's crack on and get this simmering.
The Best Black Bean Chili Recipe
To get that deep, zesty profile, we're leaning into Latin inspired flavors. The secret is not just what goes in, but when it goes in. By toasting the spices before adding the liquid, we unlock oils that would otherwise stay dormant. This creates a base that's concentrated and smoky, rather than tasting like raw powder.
This recipe is designed to be accessible. We're using canned beans and crushed tomatoes to keep the cost down and the speed up. It's the kind of meal that makes you feel like you've spent all afternoon in the kitchen, but you've actually just used a few basic ingredients and a single pot.
Since we're aiming for a budget friendly approach, I suggest serving this over some fluffy white rice or with a side of corn chips. It's a filling, high fiber meal that doesn't break the bank but tastes incredibly rich.
Flavor Techniques
The way we build this chili is all about concentration. We aren't just boiling ingredients; we're reducing them.
- Spice Blooming
- Heating the chili powder and cumin in oil for two minutes toasts the spices, deepening the flavor profile.
- Starch Release
- Mashing a small portion of the black beans releases natural starches, which thickens the sauce without needing a cornstarch slurry.
- Acid Balancing
- Adding lime juice at the very end cuts through the richness of the beans and the sweetness of the maple syrup.
- Sugar Offset
- A tiny bit of maple syrup doesn't make the chili sweet, but it balances the acidity of the crushed tomatoes.
The difference between a mediocre chili and a great one is often just the texture. A watery chili feels like a soup, while a glossy, thick chili feels like a meal. By simmering uncovered for about 20-25 minutes, we let the excess water evaporate, leaving behind a concentrated, velvety sauce.
| Method | Time | Texture | Best For |
|---|---|---|---|
| Stovetop | 50 mins | Glossy & Thick | Quick weeknight meals |
| Oven | 3 hours | Deep & Concentrated | Slow weekend cooking |
| Slow Cooker | 6-8 hours | Soft & Integrated | Set and forget prep |
I generally prefer the stovetop for this specific recipe because the high heat allows for that initial spice toast, which you just can't get in a slow cooker. If you do use an oven, just make sure to sauté your aromatics and spices in a pan first before transferring everything to a Dutch oven.
Recipe Specifications
Before we dive into the gear, let's look at what makes this specific combination work. The balance of smoky, sweet, and sour is what gives this dish its personality.
| Ingredient | Science Role | Pro Secret |
|---|---|---|
| Tomato Paste | Flavor Concentrator | Sauté it until it turns dark red to remove the "raw" tin taste |
| Black Beans | Protein & Thickener | Mash 10% of the beans to create a creamy body |
| Lime Juice | Brightness | Add only at the end; heat destroys the fresh citrus notes |
| Maple Syrup | Acidity Balancer | Use a tiny amount to round out the sharp edges of the tomatoes |
Trust me on this, don't skip the tomato paste. It acts as the glue for all the other flavors, giving the chili a weight and color that you can't get from crushed tomatoes alone. It adds a layer of umami that mimics the depth usually provided by meat.
The Building Blocks
Keep your pantry stocked with these basics, and you can whip up this meal any night of the week. I've listed the main ingredients and some smart swaps if you're missing something.
- 2 tbsp olive oil Why this? High smoke point for sautéing
- 1 medium yellow onion, diced (Substitute: Shallots for a milder taste)
- 1 red bell pepper, diced (Substitute: Frozen pepper mix, works just as well)
- 3 cloves garlic, minced (Substitute: 1 tsp garlic powder if you're in a rush)
- 2 tbsp chili powder Why this? The primary flavor base (Substitute: Ancho powder for more smokiness)
- 1 tsp ground cumin (Substitute: Ground coriander for a more citrusy note)
- 1 tsp smoked paprika (Substitute: Regular paprika + a drop of liquid smoke)
- 1/2 tsp dried oregano (Substitute: Dried basil, though less authentic)
- 1/4 tsp cayenne pepper Why this? Controlled heat (Substitute: Red pepper flakes)
- 1 tsp salt (Substitute: Sea salt or Kosher salt)
- 1/2 tsp black pepper (Substitute: White pepper)
- 2 cans (15 oz each) black beans, drained and rinsed Why this? budget friendly protein (Substitute: Kidney beans for a firmer texture)
- 1 can (28 oz) crushed tomatoes (Substitute: Diced tomatoes for more chunks)
- 2 cups vegetable broth Why this? Adds depth without fat (Substitute: Water + extra salt)
- 1 tbsp tomato paste (Substitute: Extra crushed tomatoes, reduced further)
- 1 tbsp maple syrup Why this? Balances the acid (Substitute: Brown sugar or honey)
- 1 tbsp lime juice (Substitute: Apple cider vinegar for a different tang)
Required Equipment
You don't need a fancy kitchen for this. A few basic tools will do the job.
- A heavy bottomed pot or Dutch oven: This prevents the bottom from scorching during the reduction phase.
- A potato masher: Essential for the bean mashing trick.
- A wooden spoon or spatula: For stirring the spices and scraping the bottom of the pot.
- A sharp chef's knife: For dicing the onion and pepper.
I've found that using a stainless steel pot is best here because it allows the vegetables to brown slightly, which adds more flavor than a non stick pot would. Just keep stirring during the spice toasting phase so nothing burns.
Step by step Instructions
Let's get into the actual cooking. Keep an eye on the aromas and the colors, as these are your best cues for when to move to the next step.
- Heat the olive oil over medium heat in your pot. Add the diced onion and red bell pepper. Sauté for about 5-7 minutes until the onion becomes translucent and the pepper softens.
- Stir in the minced garlic. Cook for exactly 60 seconds until the garlic smells fragrant and golden, but don't let it brown too much.
- Add the chili powder, cumin, smoked paprika, oregano, and cayenne. Stir constantly for 1-2 minutes until the spices darken slightly and smell toasted. Note: This "blooming" process is what prevents the chili from tasting like raw powder.
- Stir in the tomato paste. Mix well to coat the vegetables, cooking for another minute until the paste turns a deeper, brick red color.
- Pour in the crushed tomatoes, vegetable broth, and drained black beans. Stir in the maple syrup, salt, and pepper.
- Bring the mixture to a gentle boil, then immediately reduce the heat to low. Simmer uncovered for 20-25 minutes until the liquid has reduced and the chili looks thick and glossy.
- Take your potato masher and lightly crush about 10% of the beans directly in the pot. Stir them back in to thicken the sauce.
- Stir in the lime juice. Remove from heat once the chili reaches a heavy, spoon coating consistency.
Chef's Note: If the chili feels too thick, add a splash more broth. If it's too thin, simmer for another 5 minutes. The "spoon coating" consistency means the sauce should cling to the back of your spoon without running off instantly.
Troubleshooting Your Chili
Even with a simple recipe, things can go sideways. Here is how to handle the most common issues.
| Issue | Solution |
|---|---|
| Why Your Chili Is Watery | This usually happens if the pot is too narrow or the heat was too low, preventing evaporation. If it's too thin, don't add flour. Instead, mash more beans or simmer uncovered for an extra 10 minutes. |
| Why Your Chili Tastes Bitter | Burnt garlic or scorched spices are the usual culprits. If you smell something acrid, you've probably over toasted the spices. |
| Why Your Chili Is Too Spicy | If the cayenne was too much, don't panic. Acid and fat neutralize heat. Stir in a dollop of sour cream or Greek yogurt, or add more canned beans to dilute the spice. |
Common Mistakes Checklist:
- ✓ Did you toast the spices before adding liquid?
- ✓ Did you sauté the tomato paste until it darkened?
- ✓ Did you simmer uncovered to reduce the liquid?
- ✓ Did you add the lime juice only at the end?
- ✓ Did you mash only a small portion of the beans?
Recipe Variations
This Black Bean Chili Recipe is a great canvas for experimentation. Depending on what you have in the fridge, you can take this in a few different directions.
If you want a heartier, meat based version, you can brown some ground beef or turkey before starting the onion sauté. For those who love a bit of extra kick, adding a diced chipotle pepper in adobo sauce gives it a deep, smoky heat that's incredible.
If you're looking for other comforting, slow cooked meals, you might enjoy a turkey pasta sauce for those nights when you want a meatier base but the same "set it and forget it" vibe.
For a "Tex Mex" twist, stir in a handful of frozen corn kernels during the last 5 minutes of simmering. This adds a pop of sweetness and a different texture that contrasts well with the creamy beans.
| Target | Adjustment | Impact |
|---|---|---|
| Extra Hearty | Add diced sweet potato | Adds thickness and a earthy sweetness |
| More Heat | Add 1 chopped habanero | Significant increase in spice level |
| Lower Sodium | Use "no salt added" beans | Reduces salt but requires more manual seasoning |
Right then, if you're making this for a crowd, remember that this dish is even better the next day. The flavors have more time to mingle, and the texture becomes even more velvety.
Scaling Guidelines
Adjusting the quantity of this dish is straightforward, but you can't just multiply everything blindly.
Scaling Down (1/2 or 1/4): Use a smaller saucepan to ensure the liquid doesn't evaporate too quickly. Reduce the simmer time by about 20%, as a smaller volume of liquid reduces faster. Be careful with the cayenne; start with a pinch and taste before adding more.
Scaling Up (2x-4x): When doubling or tripling the recipe, do not double the salt and cayenne immediately. Start with 1.5x the amount, then taste and adjust. Use a very large stockpot to allow for proper evaporation.
If the pot is too crowded, the chili will steam rather than reduce, leaving you with a watery consistency. Work in batches if you're browning any extra meat to avoid crowding the pan.
Kitchen Myths
Let's clear up some misconceptions about bean based cooking.
Myth: Canned beans are "unhealthy" and tasteless. Truth: Canned beans are a budget friendly staple. The key is to rinse them thoroughly under cold water to remove the metallic tasting canning liquid and excess sodium. Once rinsed, they are a perfect, neutral base for this recipe.
Myth: You need meat to make a "real" chili. Truth: Chili is defined by the flavor profile (cumin, chili powder, peppers), not the protein. A well seasoned bean chili has the same depth and satisfaction as a meat based one, especially when you use the bean mashing technique for thickness.
Storage and Leftovers
This chili is a meal prep dream. It actually tastes better after 24 hours in the fridge because the spices fully penetrate the beans.
Fridge Storage: Keep it in an airtight container for up to 5 days. The sauce will thicken further as it cools, so you might need to add a splash of water or broth when reheating.
Freezer Storage: This freezes beautifully. Store in freezer safe bags or containers for up to 3 months. Thaw in the fridge overnight before reheating.
Zero Waste Tips: Don't toss the bean liquid (aquafaba) if you're using dried beans you soaked yourself. It can be used as an egg substitute in vegan baking. Also, any leftover onion or pepper scraps from the prep can be tossed into a freezer bag to start a homemade vegetable broth.
Serving and Presentation
The way you serve this makes a huge difference in the overall experience. Since the chili is dark and rich, you want bright, contrasting toppings.
I love serving this in a deep bowl topped with a swirl of Greek yogurt or sour cream, some sliced avocado, and a sprinkle of fresh cilantro. For a budget friendly side, a scoop of fluffy white rice works perfectly to soak up the sauce. If you want something a bit more special, serve it with homemade flour tortillas for scooping.
To make it look professional, add a final squeeze of fresh lime over the top and a few thin rings of red onion. The contrast of the green lime and purple onion against the deep red brown chili makes the dish look as zesty as it tastes. Trust me, taking two minutes to garnish the bowl changes the whole mood of the meal.
Recipe FAQs
Are black beans good for chili?
Yes, they provide a hearty texture and earthy flavor. If you enjoy this style of hearty bean based meals, you might also like our Mexican lasagna for another comforting dinner.
What is the secret ingredient for balancing the flavors in this chili?
Maple syrup and lime juice. The syrup cuts the acidity of the crushed tomatoes while the lime juice brightens the heavy, toasted spices.
Can you eat black bean chili if you are diabetic?
Yes, generally. Black beans are high in fiber and complex carbohydrates which help stabilize blood sugar, though you should monitor the portion of maple syrup.
What are common mistakes when making bean chili?
Burning the garlic or over toasting the spices. If the garlic browns too quickly or the spices smell acrid, the entire pot will taste bitter.
How do you thicken black bean chili if it is too watery?
Mash about 10% of the beans directly in the pot. This releases natural starches that create a heavy, spoon coating consistency without adding extra fillers.
Is it true that you must add flour to thicken bean chili?
No, this is a common misconception. Simmering the mixture uncovered for an extra 10 minutes or mashing a few beans is more effective and preserves the natural flavor.
How do you store and reheat this chili?
Keep it in an airtight container for 5 days in the fridge or 3 months in the freezer. Reheat with a splash of vegetable broth to loosen the sauce, as it thickens further during storage.
Black Bean Chili Recipe

